“SlideScreen jQuery Plugin” Documentation by “Paulo Lagoá” v1.0.0
SlideScreen jQuery Plugin
Created: 12/2013
By: Paulo Lagoá
Email: prlagoa [at] gmail [dot] com
Thank you for purchasing my plugin. If you have any questions that are beyond the scope of this help file, please feel free to email via my user page contact form here. Thanks!
Table of Contents
A) Introduction - top
SlideScreen is a jQuery plugin that creates a "Before and After" effect from two images with just a few lines of code. It has several options (listed below)
that allow you to further customize the way you integrate it with your website. You can, for example, define whether it will have an horizontal or vertical layout and
the starting position of the separator bar.
You can have multiple instances of the plugin working on a single page and it is touch responsive, which means it will work on mobile devices.
SlideScreen is compatible with all the major browsers: Chrome, Firefox, IE 8+, Safari, Opera.
This help file will help you get started with SlideScreen and have it up and running in no time.
B) Files - top
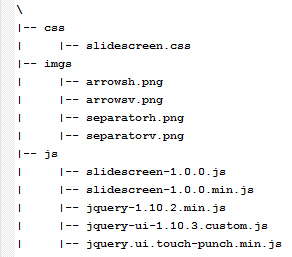
SlideScreen comes with one .js and one .css files, so these should be included in your html for you to use SlideScreen. Since this is a jQuery based plugin, you should include jQuery too. There are two other requisites for the plugin to work: you'll have to include jQuery UI and jQuery UI Touch Punch (to enable touch detection on mobile devices).
Below is a list of the files needed for the plugin. You can find the files on the appropriate folders. This list includes the plugin .js file (plus the minified version), the .css file and images that the plugin uses. Since jQuery, jQuery UI and jQuery UI Touch Punch are required, I included those .js files too.
The Javascript and CSS calls should include these:
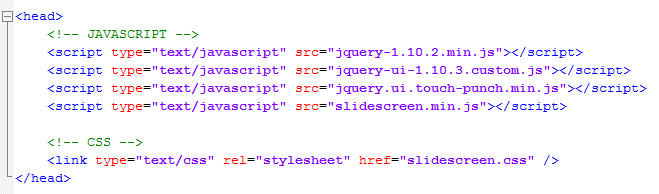
Although there's not much CSS to change in SlideScreen there's a CSS file included with some properties for the styling of the separator bar.
Also, SlideScreen comes with 4 images for the separator bar, so be sure to include these too. The images should be in the folder "imgs" on the same directory as your page.
C) Usage - top
Using SlideScreen is very simple: all you need is a simple structure like the following:

The plugin will take the first picture and make it the top layer picture in the slide screen. The second picture in structure will be on the bottom layer. If the "showCaption" option is set to true the text in the alt will be used. Ensure you're defining the width and height of the container where the images are.
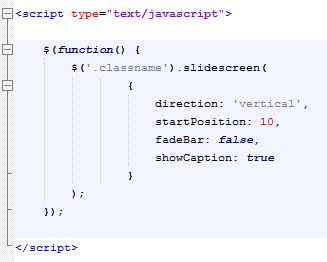
Then all you have to do is call the plugin:
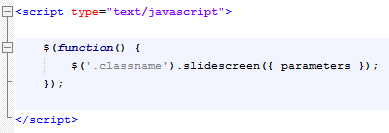
The object parameters contains all the configuration properties, listed below:
- direction [string] (default: 'horizontal') - Indicates whether the separator bar will be displayed in a vertical or horizontal layout. Possible values: 'horizontal' / 'vertical'
- startPosition [int] (default: 50) - Indicates the starting position of the separator bar. It's a percentage so the value should be between 1 and 100
- fadeBar [bool] (default: true) - Fade out the separator bar to allow a better view of the images
- clickDrag [bool] (default: true) - When set to true, the separator bar will drag to the point on the image where the user clicks
- showCaption [bool] (default: true) - Show the texts on the alt parameters of the img elements
- showHandle [bool] (default: true) - Shows the handle bar on the separator.
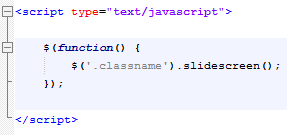
You can use the default parameter values or specify values for each parameter:
D) Try it your self - top
You can check out some demos of the SlideScreen plugin here. There are several different demos that will show you the possibilities of the plugin.
Once again, thank you so much for purchasing this plugin. Any feedback is welcome..
Paulo Lagoá